Sunset Palm tree nails

2015/08/img_3278.jpg

It’s been awhile! (Again, I know)

Today I created an accent gradient Palm tree nail. I actually did this because I was looking at building up my blog and noticed there was so much nailart I haven’t done a tutorial for!

This one is super easy. These are all you need:

2015/08/img_3284.jpg

Start with a white base to really bring out the yellow of the polish. As usual, I like to use a gel base.
2015/08/img_0109.jpg
This one is white Alpine by OPI gel color

2015/08/img_3282.jpg

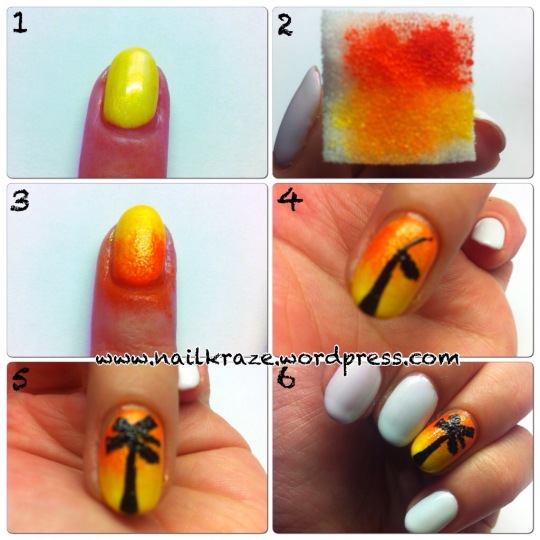
1. Start with two coats of yellow polish. This one is let’s meet by sinful colors

2. With the make up sponge, just paint on a generous strip of yellow and orange polish. Note: to re-use a sponge, just cut of the dried polish bit with scissors and start again. I’ve been using the same sponge for months!

3. Keep dabbing the finger till you get the opacity you desire

4. Using a black striper, first stripe on a black line. Nail art pens normally have a striper attached to it. I used one from Primark . Then using the pen end, draw a line connecting the striped line and just add little wiggles to draw on the leaf.

5. Keep going until it resembles a palm tree

6. Wah lah!

These one I only did the accent nail but it looks amazing with painting all the other nails yellow or with gradient nails on ๐Ÿ™‚

2015/08/img_3283-2.jpg

Heart shaped nailart

Hello!

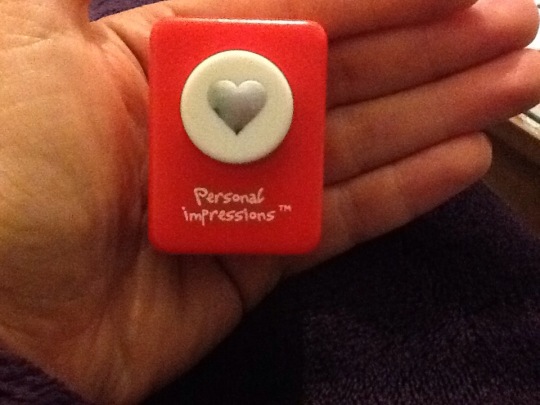
Today I went to a car boot sale and I had the most amazing find I couldn’t wait to share! I went to the car boot with the intention of buying a lamp, some nail polishes, a jar. Instead, I found this little beauty in a box full of crafty bits.

2015/03/img_3176-0.jpg

I scoured all the pound lands and 99p store for this since I saw it online! I couldn’t justify spending 5 quid on it from ebay and what not especially as I didn’t want it to arrive and being too big for my nails.

This little gem cost a bargain price of 50p and made me very very happy!

Once I got home, this happened

2015/03/img_3188.jpg

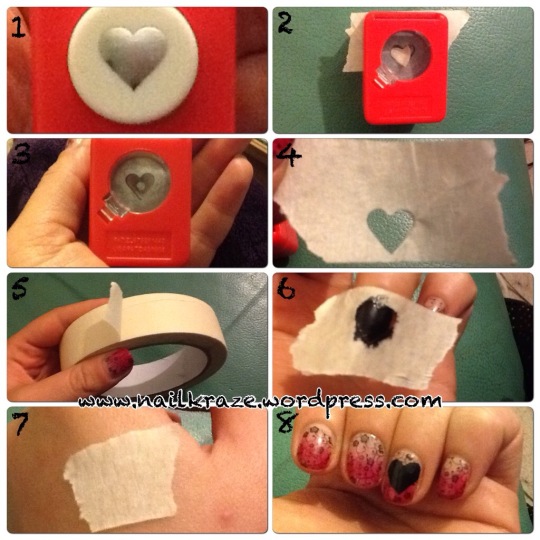
1 + 2. This is what my little gem looks like front and back. On the back, there is a plastic catch to catch all the little bits that get hole punched.

3. You need masking tape to create this look.

4. I applied hand cream on my hand and then repeatedly stuck the masking tape on my hand to make it less sticky. The hand cream really helped.

5. Simply slide the take inside the punch and punch away!

6. Make sure it cleanly punches the tape

7. Apply the heart shape on the nail and paint over it

8. Beautiful looking heart shape on the nail ๐Ÿ™‚

Geometric nailart

I’ve been a big fat fan of geometric nailart for a while since seeing burkatron’ s nail art on Instagram (follow me at nailkrazeee ๐Ÿ™‚ ). It took me a while to work out what colour to match up my Sensationail sugar plum mani and finally, I decided on gold glitter.

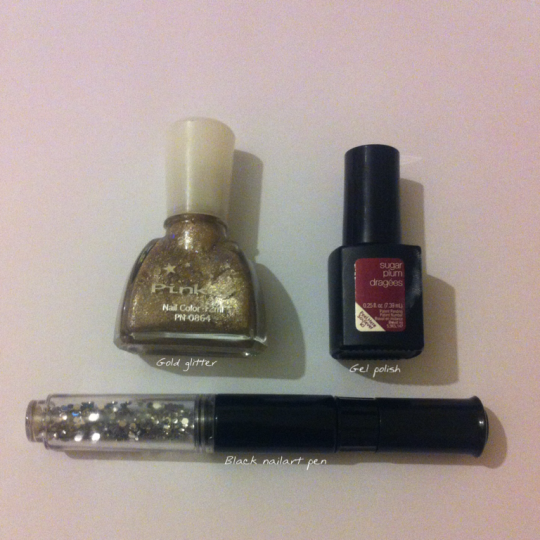
For this manicure, I only used a few things:

2015/03/img_3134.png

The nailart open is my trusted one from Primark. Unfortunately, they don’t sell it anymore and sell only the nail colour without the gems!

The gold glitter was a quid from Hong Kong and I love it to pieces. I’ve had it for over ten years and it’s not even remotely dried!

2015/03/img_3135.jpg

1. All items required for this mani! I always use a gel base due to the ease of redoing the nail when I make a mistake

2. Base mani done and dusted

3. Use a strip of gold glitter polish for each nail. I positioned the polish strips at different areas on each area for a bit of variety

4 + 5. Randomly draw on triangles on each nail. I liked having three triangles per nail. It seems to be a good balance.

6. Simply finish off with a topcoat! Simples!

I didn’t make any mistakes and finished this look within ten minutes and I love it!

Hope you do too ๐Ÿ™‚

Movember nails

IMG_2883.JPG

Since I’ve owned these moustache stamps, I’ve been waiting for movember to stamp away! Alas! Movember is now here and what better way than to stamp it on some gorgeous bright Barry m polishes!

barry m is doing an awesome deal at superdrug at the moment with 3 for 2. I originally wanted raspberry, pomegranate and the rose gold but they didn’t have raspberry in my local store so I settled for white. You can never have too many whites, right?

IMG_2876.JPG

I used pomegranate for this look but I think I will try to use them all in my next nail art.

I’ve topped them with a gel topcoat from gelaze and it’s so incredibly shiny! I hope it lasts till the end of the month!

P.s. They are stamped with konad polishes

Happy movember everyone ๐Ÿ™‚

IMG_2835.JPG

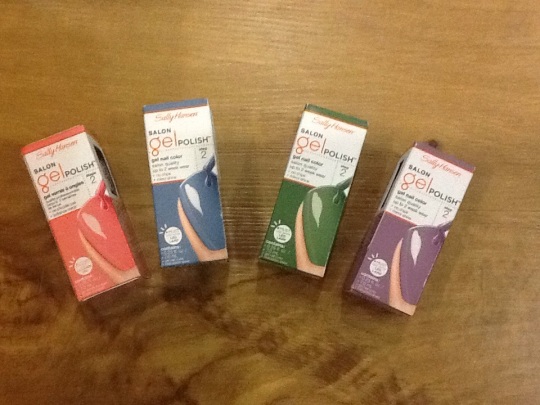
You will not believe my surprise and amazement when I was doing my regular browse in TK Maxx for bargain polishes!!

Sally Hansen polishes have made it to the motherland!! As you may or not not know, my gel polish journey started with the Sally Hansen gel polish starter kit [check out one of my earlier post!] I have not looked back since!!

Not only that, but it was ridiculously cheap! cheaper than normal polishes! It was 2.99 pounds, reduced down from RRP of 11.99 pounds!! say whaaaaaaaaaaaat (in Leonard from Big Bang theory’s voice

If any if you other gel nail fanatics are reading this pool down to your local TK Maxx for a browse!

I ended up with good as blue, just peachy!, green streak and laven-darling. I was actually going to just buy two and leave out the blue and purple as I already have so many hues of blue and purple. But it was almost rude to leave them behind…

Mummy nails

IMG_2765.JPG

Today I have a quick tutorial on doing some mummy nails. This mummy is best placed in the accent nail or with some halloween friends for company

IMG_2789.JPG

I will try to get mummy’s friends tutorial used as well if I have time this halloween ๐Ÿ™‚

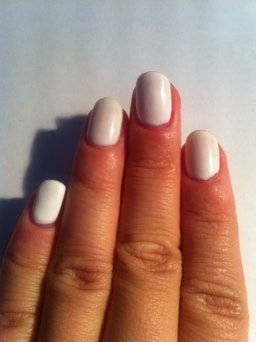
To do this mani, start with a white base. I always use gel polishes for my bases.

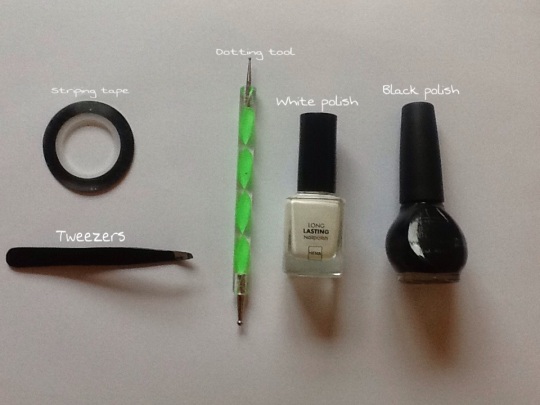
To do this mani you will need

IMG_2818.JPG

Once you have hunted and gathered….

IMG_2816.JPG

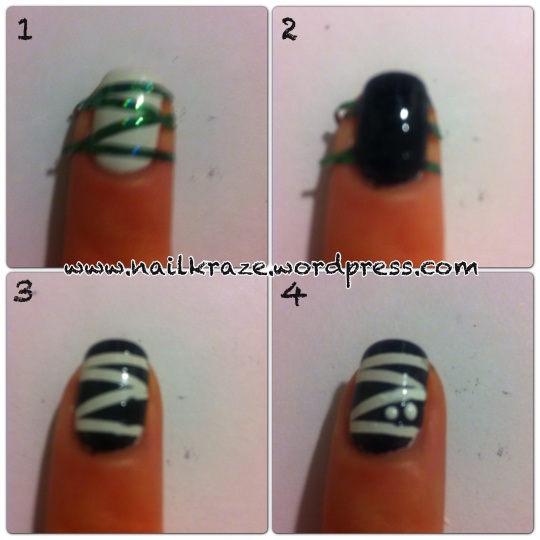
1. Cut yourself four pieces of striping take and place them over the nail Ina zigzag fashion. A “Z” shape normally works bests. Make sure you leave a big enough gap for eyes

2. Apply a generous layer of black polish all over the nail

3. Gently but firmly pull the tape off with tweezers. Start with the last piece of tape you applied otherwise it could get messy. Have some polish remover to hand as the lines might blur. I’m pretty OCD about having neat lines… Where the lines overlap, just use a fine marker and mark on lines to separate the overlaps

4. When the polish dries, use a big dotting pen to dot on two white dots and then a smaller dot inside with the black polish. Wait for it to dry before applying top coat and wah lah, mummy nails ๐Ÿ™‚

Tribal nailart

IMG_2643.JPG
This mani was inspired by trendy polish on Instagram. When I first saw it, I knew I had to recreate it!

To recreate this look I used a red gel polish as my base.

You will need:
White and black nail art pen
Gold Studs

Simples!

IMG_2647.JPG

1. Start with a red gel polish base. For my accent finger I used a glittery red gel polish (this is the finger being shown)

2. Use the while nail art pen and draw two lines down either side of the middle then fill it in. Alternatively, if you don’t own a white nailart pen, you could use striping tape for more precision and use a white polish.

3. Draw on a black line over the white borders after waiting for the polish to dry

4. Start by drawing zigzags

5. Then fill in these zigzags with small black triangles

6. Wait for the black polish to dry then stick on the studs either with a topcoat or nail glue. I prefer nail glue incase the topcoat smudges the nailart

Striping tape mani

striping tape mani

I have just obtained my airline transport pilot license!! Whoop whoop! Biggest accomplishment to date! Still trying to get used to having time off After two years of hardcore studying, emotional roller coaster and inner strength.

I am, however, taking advantage of it with all the lovely nail products I’ve had but never really had the time to play with. Namely striping tapes. I’ve always loved the idea of it but I’ve only tried it once and it was so complicated and faffy! So I only ever did it with accent fingers. But now I have all the time in the world wheeeeee! Well, until I get myself a bar job to get some income coming in.

To get started you will need:

IMG_2632.JPG

To start, paint all nails with a dark polish. I used opi I saw…u saw…Warsaw

striping tape tutorial

1. Cut the striping tapes into bits for easier placement. I found this easier than using the tape straight onto my nail but it was a little harder getting those straight lines.

2. Start with the centre tape. Then divide the sections up. DONT just use one tape across the nail next. You want to split up the two sides to unaligned sides. Do that to all the fingers except the accent finger

3. On the accent finger, apply a glitter polish. I used chinaglaze Dorothy who? Then I applied a topcoat and while it’s wet, apply the rhinestones. I bought mine off ebay ๐Ÿ™‚

4. Once you’re ready, apply a generous layer of pink polish. You want to do a finger at a time.

5. Once applied, use the tweezers to remove the striping takes. Don’t be too fast on this otherwise it will smudge the lines. You also want to remove it in order of how you applied the tape, leaving the centre tape last.

6. Apply a generous layer of fast drying topcoat. If you don’t use a fast drying type then it will smudge!

Good luck and happy striping ๐Ÿ™‚

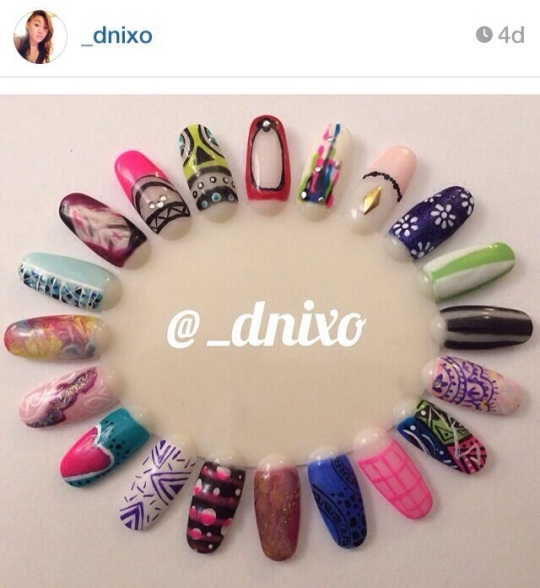
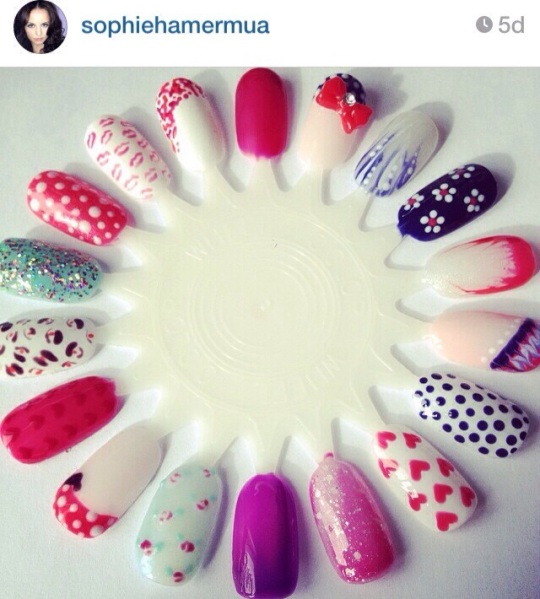
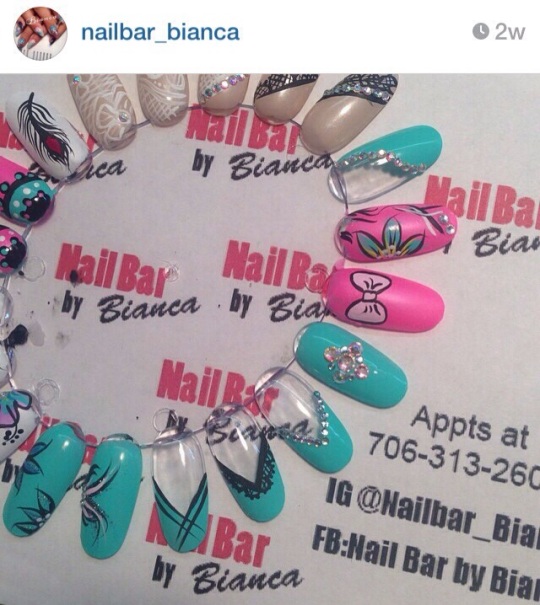
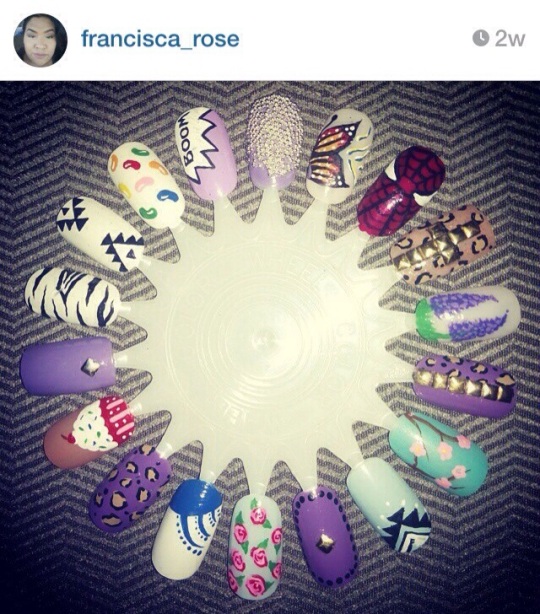
Don’t you just love looking at what other people are doing to help inspire your creations? I spend endless hours scrolling through Instagram and Pinterest looking at what creations and colour combinations nailart artists get up to. My particular favourite is nail wheels.

I have a god daughter who is seven years old and I am always thinking of ways to give her presents in a more creative way. As I am currently completing my airline pilot license, I haven’t got the funds to buy her the best toys. One year I wanted to run a cupcake stall for her and her little friends but unfortunately, I found out one of her friends was already doing that and had to cancel. I’m thinking about running her a nailart one next summer with a nail wheel they can choose their designs from.

These nailart wheels are just too good not to share.

I purposely screenshot them with the Instagram usernames on so please take a look at their accounts should a nail wheel inspire you ๐Ÿ™‚

20140908-143329.jpg

20140908-143343.jpg

20140908-143401.jpg

20140908-143417.jpg

20140908-143430.jpg

20140908-143436.jpg

20140908-143442.jpg

20140908-143449.jpg

20140908-143454.jpg

I hope this inspires you as much as it did me ๐Ÿ™‚

Pastel leopard prints

This lovely leopard print design got me my most popular Instagram upload of all times! (Check it out @nailkrazeee) It’s a great look for the summer and definitely shines out from the rest ๐Ÿ™‚

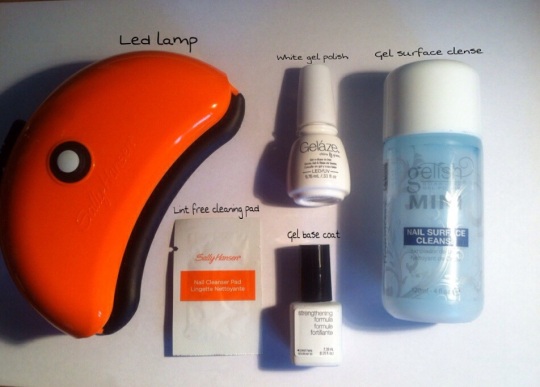
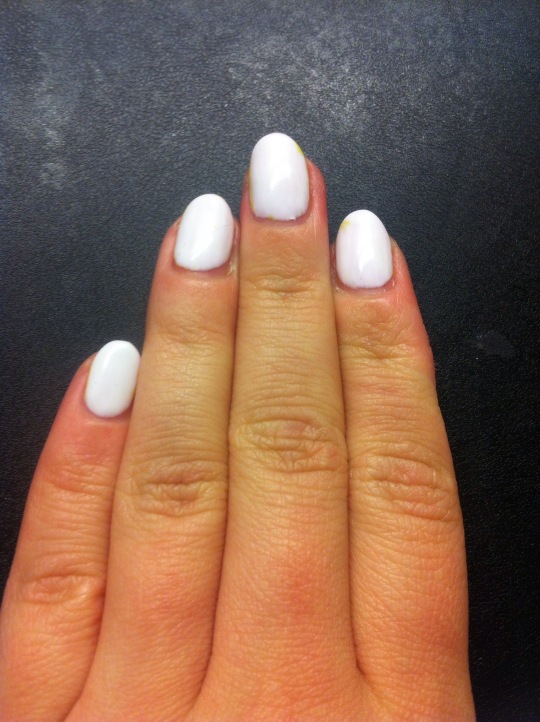
To create look you will need a white gel base. I like using gel colours as my base because it is great for when you make a mistake and want to start all over. I love being practical and taking short cuts!

gelaze white on white swatch

To do so, you will need:

20140806-144519.jpg

As you can see, I like to use a variety of products. Of all of them, my personal favourite and the one product I will not do my gel nails without is the SensatioNail strengthening base coat. It does wonders to the strength of my nails! prior to discovering it, I had poor nails that were brittle and easily broken. These made my nails feel so strong! There is a significantย difference in how my nails felt after removing my gel nails!

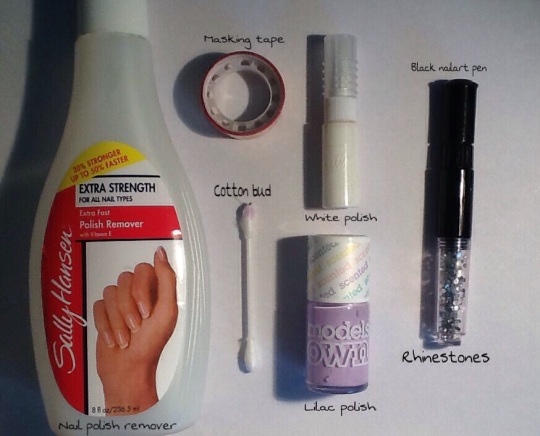
Once that’s all done, this is everything you need to recreate this mani:

20140806-144606.jpg

20140806-144655.jpg

2. Start with lilac police and paint the ring finger.

3. When it’s dry, place masking tape over half the finger and remove the polish (after you’ve repeatedly stuck the tape on yourself to make it less tacky). You could also do it the other way round and stick the masking tape over the white and paint only half the ring finger straight away.

4. Use the lilac to randomly dab all the fingers and the white part of the ring finger. You should be aiming for 4-5 random dabs per finger and around 3 on the ring finger. Vary the shapes into longish strokes, circles and trugular,
On lilac part of the ring finger, do the same but with white polish.

5. Use the black nailart pen to draw in the leopard patterns. On the stroke dabs, you want to draw two lines around the long parts of the stroke. For the triangular and circular dabs, you want to just draw three lines around the colour. Add random black dots here and there to fill up the gaps.

With the ring finger, wait for the polish to dry. Paint topcoat over it then position rhinestones over the line. I like to use my tweezers for this.

Ta dah!